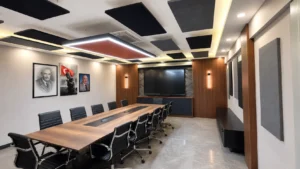
“Office Acoustic Design: What Happens From First Brief to Final Handover”

Office Acoustic Design: What Happens From First Brief to Final Handover
A professional office acoustic design project runs through seven stages: brief and goals, on-site survey and measurement, diagnosis and reporting, design and material selection against target metrics, production, installation, and a post-installation verification measurement before handover. Each stage produces a concrete deliverable — a report, a drawing, a measured result — so that at every point the client can see exactly what problem is being solved, what it will cost, and how success will be checked. This article walks through that process in the order it actually happens, using real project patterns from our office acoustic design and Proline Nidakule work as illustrations.
Facility managers and architects who come to us for the first time usually have one of two starting points: a specific complaint (“meeting rooms are unusable, calls fail, staff can’t concentrate”) or a project already underway (a new office fit-out, a relocation, a renovation) where acoustics needs to be designed in rather than fixed later. Either way, the process below is the same. What differs is only where you enter it — a renovation project typically starts at stage 1 with a blank floor plan, while a complaint-driven project starts at stage 1 with an existing space and a measurable problem.
Why a defined process matters more than it sounds
Acoustic treatment is frequently sold as a product decision — pick some panels, choose a color, install them, done. That approach produces disappointing results more often than it produces good ones, for a simple reason: you cannot correctly size or place acoustic material without first knowing what the room’s actual acoustic condition is and what condition it needs to reach. A meeting room with a reverberation time of 1.4 seconds and one with 0.9 seconds both “look” the same walking in, but need very different amounts of treatment to reach the 0.5–0.8 s target for speech. Skipping straight to material selection means guessing at both ends of that equation.
This is also why we treat the process as a sequence of measured checkpoints rather than a single “install day.” Every stage below exists because it either prevents a costly mistake later or gives the client (and us) a way to verify the work actually did what it promised.
The seven stages, in order
Stage 1 — Brief and goals
Every project starts with a conversation, not a quote. We need to understand what problem is actually being solved before proposing anything, because “the office is noisy” can mean at least four different things: reverberant meeting rooms, distracting open-plan speech, HVAC or mechanical noise, or poor speech privacy between confidential spaces and the rest of the floor. Each of those has a different fix, and conflating them leads to spending budget on the wrong lever — treating ceilings when the real complaint is that call rooms leak sound to reception, for instance.
At this stage we typically ask about:
- What specific complaints have been raised, by whom, and how often
- Whether this is a retrofit to an occupied space or part of a new fit-out / relocation
- Any hard constraints: budget range, timeline, listed-building or lease restrictions, aesthetic requirements, working hours the space must stay operational
- Whether there is an existing acoustic report or previous treatment already in place
This is also the point where we explain, honestly, what acoustic treatment can and cannot do — see what office acoustics actually means for the underlying distinction between absorption (controls reverberation and reflected sound inside a room) and insulation (blocks sound from passing between rooms). A client whose real problem is a neighboring meeting room’s speech leaking through a partition wall needs wall sound insulation, not ceiling panels — no amount of absorption will fix that.
Stage 2 — Site survey and measurement
This is where the project moves from opinion to data. A site visit is scheduled and we take physical measurements rather than relying on a walkthrough impression, because rooms that sound similar to the ear can measure very differently, and the treatment quantity depends entirely on the gap between measured and target values.
For open-plan floors, the survey follows ISO 3382-3 methodology and records the parameters that describe how speech behaves across the space:
- D2,S — spatial decay rate of speech per distance doubling (target ≥ 7 dB; below 5 dB is poor)
- Lp,A,S,4m — A-weighted speech level at 4 metres (good is roughly ≤ 48 dB; above 50 dB is poor)
- rD — distraction distance, where speech intelligibility (STI) drops below 0.50 (target < 5 m)
- rP — privacy distance, where STI drops below 0.20 (the point speech is essentially unintelligible)
- Lp,A,B — average background noise level
For enclosed rooms — private offices, meeting rooms, boardrooms — we measure reverberation time (RT60) per the Sabine relationship (RT60 = 0.161 × V / A), across octave bands, along with background noise level and, where insulation is the concern, sound level difference between adjacent spaces. We go into the full measurement methodology, equipment, and what a proper survey checklist covers in our article on what a professional acoustic survey includes and how acoustic measurement is actually performed — it is worth reading if you want to know what to expect on survey day, or what to ask a consultant who claims to have surveyed your space.
A survey also records the things a measurement instrument won’t tell you: furniture layout, HVAC diffuser positions, existing ceiling type and grid, glazing, structural constraints, and how the space is actually used versus how it was designed to be used. This context is what turns a set of numbers into a workable design later.

Stage 3 — Diagnosis and acoustic report
Survey data on its own doesn’t tell a facility manager what to do; it needs to be interpreted against the relevant target and turned into a diagnosis. This is the stage where we produce a written acoustic report: measured values per zone or room, compared against the applicable target (ISO 3382-3 for open-plan, RT60 targets by room use for enclosed spaces), with a plain-language explanation of what’s driving the gap.
Reading a report like this is its own skill, and we’ve written a guide on how to read an acoustic report — RT60, STC, NRC, STI explained in plain terms, because the report is the document every subsequent decision is based on. Common diagnoses at this stage include: hard ceiling and glazing causing excessive reflection (an absorption problem), open desking with no screening near a high-traffic walkway (a blocking problem), or a partition wall built to a residential rather than commercial specification leaking speech into an adjacent confidential space (an insulation problem). Most real offices have some combination of these, which is why the report ranks issues rather than proposing a single blanket fix.
Stage 4 — Design and material selection against target metrics
With a diagnosis in hand, design work translates target numbers into a physical specification: what type of absorptive material, how much surface area, where it goes (ceiling, wall, freestanding screen), and — for open-plan speech control — whether absorption alone reaches the target or whether blocking (screens, layout changes) and sound masking need to be added. This is the Absorb – Block – Cover framework we use for open-plan speech control, covered in more depth in our article on noise absorption, masking, and screens.
Design decisions are quantity-driven, not aesthetic-driven, though aesthetics and integration with the existing interior are absolutely part of the brief. For a meeting room needing to drop RT60 from a measured 1.3 s to a 0.5–0.8 s target, the design specifies enough absorptive surface area, in the right material and mounting, to close that specific gap — not “some panels,” but a calculated quantity checked against the Sabine relationship before it’s ordered. The same discipline applies to insulation work: if the diagnosis shows a wall failing to block adjacent-room speech, the design specifies the wall build-up, door specification, and any penetrations (services, glazing) that need addressing, because a well-insulated wall with an untreated hollow-core door underperforms the wall by a wide margin.
At this stage we also confirm material choices, fire ratings, and finish options with the client, and issue drawings showing exact placement — this is the point where the client sees, concretely, what the finished space will look like and how it will perform.
Stage 5 — Production
Once the design is approved, materials are produced or procured to the specification — this includes absorptive panels and ceiling elements in the confirmed finish, and, where insulation work is involved, the wall, door, or partition components specified in stage 4. Lead times here depend on material type, quantity, and finish customization, and are usually the single biggest variable in a project’s overall timeline (see the timeline table below).
Stage 6 — Installation
Installation is scheduled around the client’s operational needs — many office projects happen in phases, out of hours, or over a weekend specifically to avoid disrupting a working floor. Site conditions are confirmed again before installation (ceiling grid compatibility, wall condition, access), and the crew installs to the approved drawings rather than improvising on site, since placement accuracy matters for both the acoustic result and the finished appearance.

Stage 7 — Verification measurement and handover
This is the stage most acoustic projects skip, and it’s the one that actually proves the work did what it was supposed to do. After installation, we re-measure the same parameters recorded in stage 2 — RT60, D2,S, rD, or whatever the original diagnosis targeted — in the same rooms or zones, and compare the before and after numbers directly. Handover includes this verification data alongside the original report, a summary of what was installed and where, and any maintenance guidance for the materials used.
Without this step, “did it work” is a matter of impression rather than fact — and impressions are notoriously unreliable for acoustic change, because people adapt to an improved room within days and stop noticing the improvement even though the numbers back it up. A verification measurement is also the only way to catch a design that under-performed (undersized treatment, an installation detail that leaves a gap) while it’s still straightforward to add more, rather than after the project is considered “closed.”
The process at a glance
| Stage | What we do | What you get | Typical timeline |
|---|---|---|---|
| 1. Brief & goals | Discuss complaints, constraints, budget range, project type | Scope summary, initial guidance | 1 meeting / same week |
| 2. Site survey & measurement | On-site RT60 and/or ISO 3382-3 measurement, layout and constraint review | Raw measured data, site notes | 1 site visit (half–full day depending on floor size) |
| 3. Diagnosis & report | Compare measured values to targets, identify root cause(s) | Written acoustic report | 3–7 working days after survey |
| 4. Design & material selection | Size treatment against target metrics, specify materials, issue drawings | Design drawings, material spec, formal quote | 1–3 weeks depending on scope |
| 5. Production | Manufacture/procure specified materials and finishes | Confirmed delivery date | 2–8 weeks (material- and finish-dependent) |
| 6. Installation | Install to approved drawings, usually out of hours for occupied floors | Completed treatment | Days to a few weeks by project size |
| 7. Verification & handover | Re-measure the same parameters post-installation | Before/after results, handover pack | 1 site visit shortly after installation |
Timelines above are typical ranges from projects of comparable scope, including our office acoustic design work and the Proline Nidakule project, not guarantees — every building has its own access, lead-time, and phasing constraints, and we confirm a firm schedule as part of the stage 4 proposal.
What drives cost and timeline — set realistic expectations early
Two questions come up in nearly every first conversation: “how much will this cost” and “how long will it take.” Both depend heavily on variables that aren’t visible until the survey and design stages, which is exactly why we don’t quote a number before stage 4. The main drivers are:
- Scope: absorption-only treatment (ceilings, walls, screens) versus insulation work (walls, doors, partitions) versus a combination — insulation work generally costs more per square metre and has longer lead times than absorption.
- Area and quantity: how much surface area the diagnosis says needs treatment, which is a direct output of the measured gap between current and target RT60 or D2,S — not a guess.
- Finish and integration requirements: standard finishes install faster and cost less than custom colors, printed graphics, or bespoke ceiling integration.
- Occupied vs. unoccupied installation: working around a live floor (out-of-hours, phased installation) extends timeline compared with installing into an empty fit-out.
- Access and building constraints: ceiling grid type, structural fixing points, lift/loading access for materials, and any listed-building or lease restrictions.
We go into cost drivers, typical ranges, and how to compare quotes properly in our dedicated article on acoustic treatment project cost — worth reading before you request quotes from multiple firms, since “price per panel” comparisons without a matching survey and target behind them are not comparing like for like.
What to prepare and what to ask — a checklist for facility managers
Coming into stage 1 with a few things ready shortens the whole process and produces a better brief:
- A floor plan (even a rough one) showing the areas of concern, room uses, and desk density
- A clear statement of the actual complaint — who is affected, what specifically they experience, how often — rather than a general “it’s noisy”
- Any existing acoustic reports, previous treatment records, or building specifications (wall types, ceiling systems) if available
- A realistic budget range and any hard timeline constraints (lease dates, a fit-out deadline, an event the space needs to be ready for)
- Decision-making authority clarified — who signs off the design and the finish choices, so stage 4 doesn’t stall waiting for internal approval
Questions worth asking any acoustic consultant, including us, before committing to a project:
- Will you measure before proposing a solution, or quote from a floor plan alone?
- What target metric are you designing to, and how was it chosen for my room type?
- Will I get a written report, not just a verbal recommendation?
- Is there a verification measurement after installation, and is it included in the price?
- What’s driving the lead time — is it material production, installation access, or something else?
We cover the broader question of vetting a consulting firm — credentials, methodology, red flags — in how to choose an acoustic consulting firm, which is a useful companion read alongside this checklist.
What real projects look like
The office acoustic design and Proline Nidakule projects both followed this same seven-stage sequence — starting from a brief about specific meeting-room and open-plan complaints, through measurement, diagnosis, a design sized to close a measured gap, production and installation phased around a working office, and a verification measurement at the end. The details of material, layout, and treatment quantity differed because the measured starting conditions and building constraints differed — which is the point: the process is standard, the specification it produces is specific to each building. If you want to see the full scope of documented work, our projects page has the broader portfolio across office, hospitality, and institutional spaces.
Setting expectations honestly
A few things worth being direct about before you start a project. Absorption treatment reduces reverberation and reflected sound inside a room; it does not stop sound from passing through a wall to the next room — that requires insulation, a physically different intervention with its own cost and lead time. Sound masking raises the background noise floor to shorten effective privacy distance; it does not “cancel” sound and will not fix a room with no absorption at all. And no amount of good design guarantees a good result without the verification step — the only way to know a project achieved its target is to measure it again after installation, which is why we build that into every project rather than treating it as optional.
Where to start
If your office has a specific acoustic complaint, or you’re planning a fit-out and want acoustics designed in from the start rather than fixed after the fact, the next step is the same either way: a measured survey that tells us — and you — exactly what the current condition is and what it would take to reach a good one. Request a site survey and acoustic measurement and we’ll walk you through what we find, what a design would target, and a realistic cost and timeline before you commit to anything.
Frequently asked questions
How long does a full office acoustic project take from first call to handover?
It varies by scope, but a typical project runs from a few weeks (survey through design) to production and installation lead times of 2–8 weeks depending on materials and finishes, plus a short verification visit after installation. Simple absorption-only projects on an unoccupied floor move faster; combined absorption-and-insulation projects on an occupied floor with phased out-of-hours installation take longer. We confirm a firm schedule once the design stage quantifies the actual scope.
Do we really need a measured survey, or can you quote from photos and a floor plan?
We can give a rough budget indication from a floor plan, but we cannot size a design correctly without measured RT60, D2,S, or insulation data, because the treatment quantity is calculated directly from the gap between measured and target values. A quote without a survey behind it is either overengineered (wasting budget) or underengineered (failing to hit the target) — we’d rather tell you that upfront than sell a guess.
What’s included in the acoustic report you provide?
The report documents measured values per room or zone (RT60, or ISO 3382-3 parameters for open-plan speech, or insulation performance where relevant), compares them against the applicable target for that room’s use, and explains in plain language what’s driving any gap. It’s the basis for the design stage and is yours to keep regardless of whether you proceed with treatment through us.
Can acoustic treatment be installed without disrupting a working office?
In most cases, yes — installation is commonly phased and scheduled out of hours or over weekends specifically to avoid disrupting an occupied floor. This is confirmed during the design stage once we know the scope and can plan access and sequencing around your operational hours.
What happens if the verification measurement shows the design didn’t fully hit the target?
We treat this as an unfinished project rather than a closed one — the verification step exists specifically to catch this while it’s straightforward to address, whether that’s additional absorptive area, a sealing detail on an insulated wall, or an adjustment to masking level. This is exactly why we build re-measurement into the process rather than relying on how the space “feels” after installation.
Do you handle both reverberation problems and sound-privacy problems, or just one?
Both, and importantly, the diagnosis stage is what determines which one (or both) a given complaint actually is. Reverberation (echo, harsh-sounding meeting rooms) is an absorption problem; sound leaking between rooms or across open-plan desks is a blocking/insulation and masking problem. Many real offices have some of each, which is why the survey and report stages exist before any material is specified.
Designing silence for real spaces.
Offices, hotels, restaurants, schools and healthcare — measured acoustic solutions, delivered end to end.